
 When I told Dave that I wanted to post about Cheese Straws, he asked,
“Are you sure you haven’t posted on that before?”
I said, “Yes, I’m sure I haven’t”.
He said, “But you love them! They are delicious, a classic, and you’ve made them for years! Are you sure?”
I said, “I know! I’m sure. I’ll go search, but pretty sure I haven’t. That’s why I must!”
So here it is. A post on beloved Cheese Straws.
I grew up on them as a go-to party food. They are one of my favorite treats! Since this recipe is basically: butter, cheese, salt and some red pepper, what’s not to love?! Recipes for these savory snacks come in a variety of forms and versions, which I think are pretty much all delicious. However, my friend Blair makes her family recipe and I must say, I think it tops them all. I believe it’s the extra sharp cheddar cheese.
This December I got a package in the mail from Blair. I was so excited and surprised to get a box at my door that wasn’t an Amazon or Target package delivering presents we had ordered to give away. I opened it to find a beloved tin of cheese straws! What a generous gift to make, package and ship a treat for our family. I felt so loved. I tore into them and Asher joined me. He and I both oohed and ahhed at how tasty they were. I texted Blair to let her know they had arrived and how much we were loving them. I asked her for the recipe.
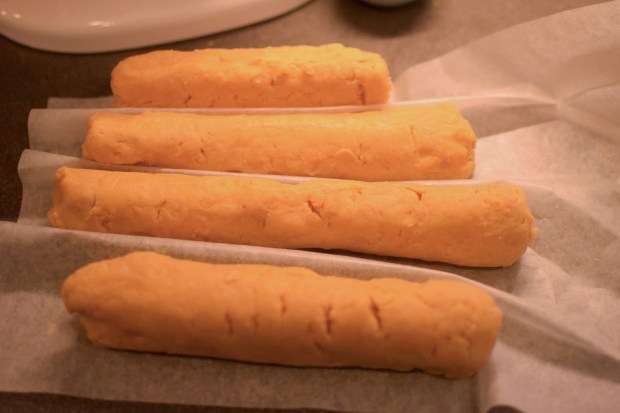
I tried following her directions, but failed at the piping into “straws” with my mom’s cookie press- the dough was too thick to push through the metal plate. I am guessing it was user-error, not the fault of the recipe or the cookie press. So I took the easy route and rolled the dough into logs, refrigerated until firm and sliced them into wafers.
We have been trying to decide whether to call them Cheese Coins or Cheese Wafers or Cheese Crackers because Cheese Straws just didn’t seem true to their shape. For now, we are still calling them Cheese Straws, because Lainey said, “they will always be cheese straws to me.” 🙂 I have to agree.
I have served them a few times in the past month. I made them for a work event honoring senior students and their Field Instructors and for our church’s baptism service last week. They are really versatile (great as an appetizer, breakfast food , or reception goody), as they add a nice, savory crunch to any event. (My mom oftentimes keeps the dough in the freezer, to bake off as needed for an appetizer at a dinner, or as a snack with cider in the winter.)
Cheese Straws (or Coins or Wafers) makes lots- depending on how large you roll it and how thin you slice them
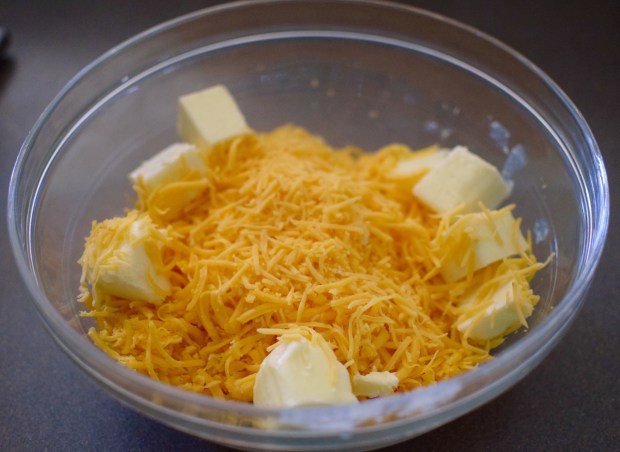
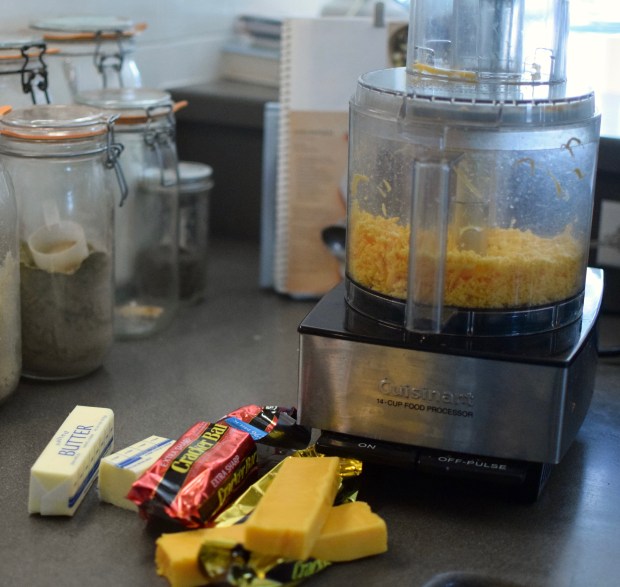
2.5 blocks of Cracker Barrel brand cheddar cheese (I use a mixture of sharp and extra sharp- If you can’t find this brand, just make sure it’s good and sharp!)
1 1/2 sticks (3/4 cup) of butter
2 cups of all purpose flour
1 tsp salt
1 tsp cayenne pepper (I used a heaping teaspoon to make mine with a little extra kick)
Shred cheese and put in a bowl with the butter, cover and leave out overnight to soften. (Or speed along in the microwave on ½ power for a minute or 2, checking on the progress every 30 seconds or so. You don’t want it to melt!)
Combine cheese & butter mixture using your hands, or in a food processor. Add flour, salt & cayenne; then combine again using your hands to form dough.
Roll into logs and refrigerate for an hour or so until firm.
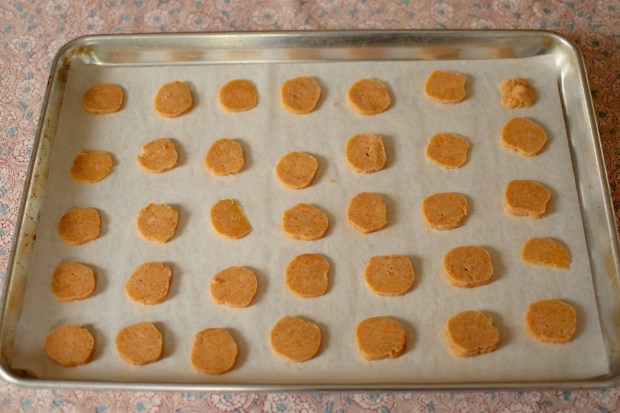
Cut into thin circles. (Or roll out and cut with cookie cutters or press through a cookie press- if you can figure that out.) If slicing them, we found we liked them super thin- the thinner the crispier.
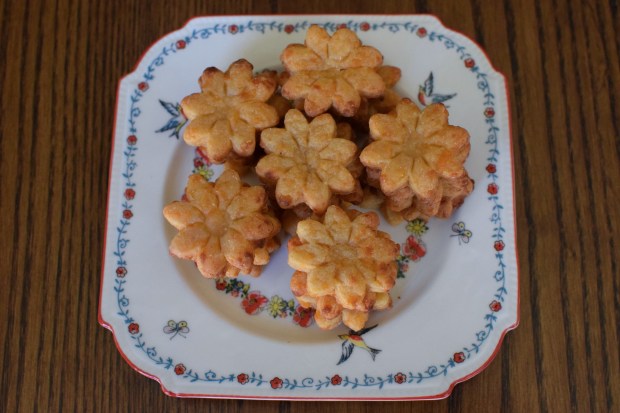
These lovely cheese straw flowers were made by my mom for a bridal luncheon she catered this week. I don’t have photos of the rolling out and cutting, just the final product, but wanted to show you these beauties!
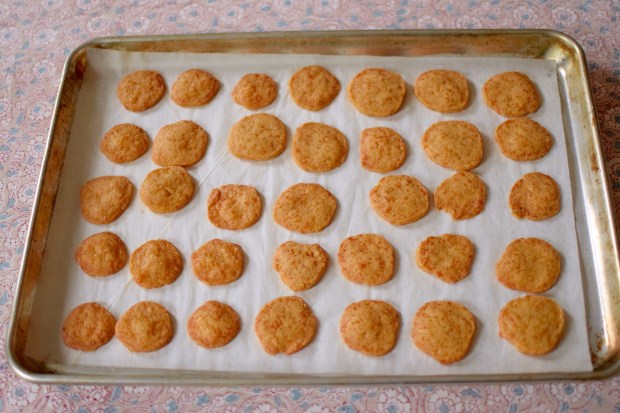
Place on an ungreased cookie sheet (lined with parchment for easy clean up) an inch apart- because they grow.
Bake at 325˚ for 11-13 min, each batch tends to vary in length of bake. I tend to start watching at 10 minutes and take out when they are tan at the edges.
The uncooked dough can keep in the refrigerator or freezer and you can slice and bake off as needed. Or freeze them baked and reheat, by spreading in a single layer on baking sheet for 10 minutes in 250 degree oven.
 **Dear faithful readers, if you were formerly subscribed to the Cup-A Cup-A feed via email or some type of reader, and you want to continue to get the feed, you will need to subscribe in the side menu to Community Table. I realized recently, that though the content has migrated and the blogs have merged, people are not getting the alert when I post. Sorry for this inconvenience! Thanks for joining us at the table!**

One thought on “Cheese Straws”